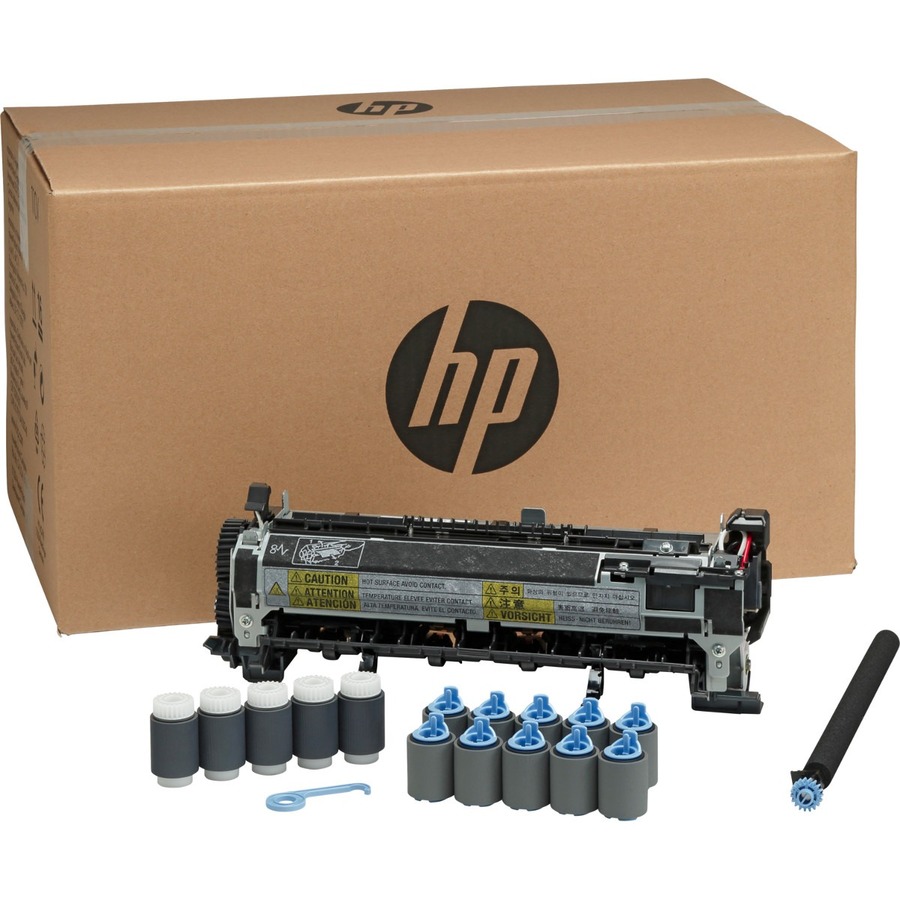


| Brand | HP |
| Type | Maintenance Kit |
| Supported Products | HP Laserjet M607, M608, M609, M610, M611 |
| Package Contents | Fuser assembly for 220VAC, transfer roller, and tray 2 through six roller kit |
| Warranty Details | No warranty |
Hp Maintenance Kit 220 VAC L0H25A-67901
The HP LaserJet 220V Maintenance Kit (L0H25A) is a high-quality maintenance kit designed for precise and efficient printer maintenance. Engineered for accuracy, it delivers consistent print quality and reliable paper handling, making it ideal for high-volume printing environments.
With a typical page yield of up to 225,000 pages for HP LaserJet Enterprise M60X series printers, this maintenance kit ensures professional-grade output, maintaining consistent performance even in demanding environments. Its durable construction supports long-term use while minimizing downtime, keeping your printing operations efficient.
Easy to install, the HP LaserJet 220V Maintenance Kit helps maintain reliable and consistent performance for all your printing needs.
Components Included: 220V fuser unit, transfer roller, and feed rollers
Compatibility: Designed for HP LaserJet Enterprise M607, M608, M609, M610, M611, M612, and E60055dn series printers
Page Yield: Up to 225,000 pages for HP LaserJet Enterprise M60X series; up to 247,000 pages for HP LaserJet Managed E601XX and E600XX series
Operating Temperature Range: 15 to 32.5°C
Operating Humidity Range: 10 to 80% RH
Package Dimensions: 498 x 238 x 239 mm
Weight: 1.7 kg (product weight); 3 kg (package weight)
100 percent genuine and brand new products
warranty support
Responsive after sales service
Expert consultation and support to help you choose the right product
The best wholesaler IT products in BD with exclusive deals
A complete ecommerce solution for IT products in Bangladesh provided by Eastern IT
Get the Hp Maintenance Kit 220 VAC L0H25A-67901 at the best price in Bangladesh. Check latest price in BD is Call for price.
No video available
No questions submitted for this product yet.